

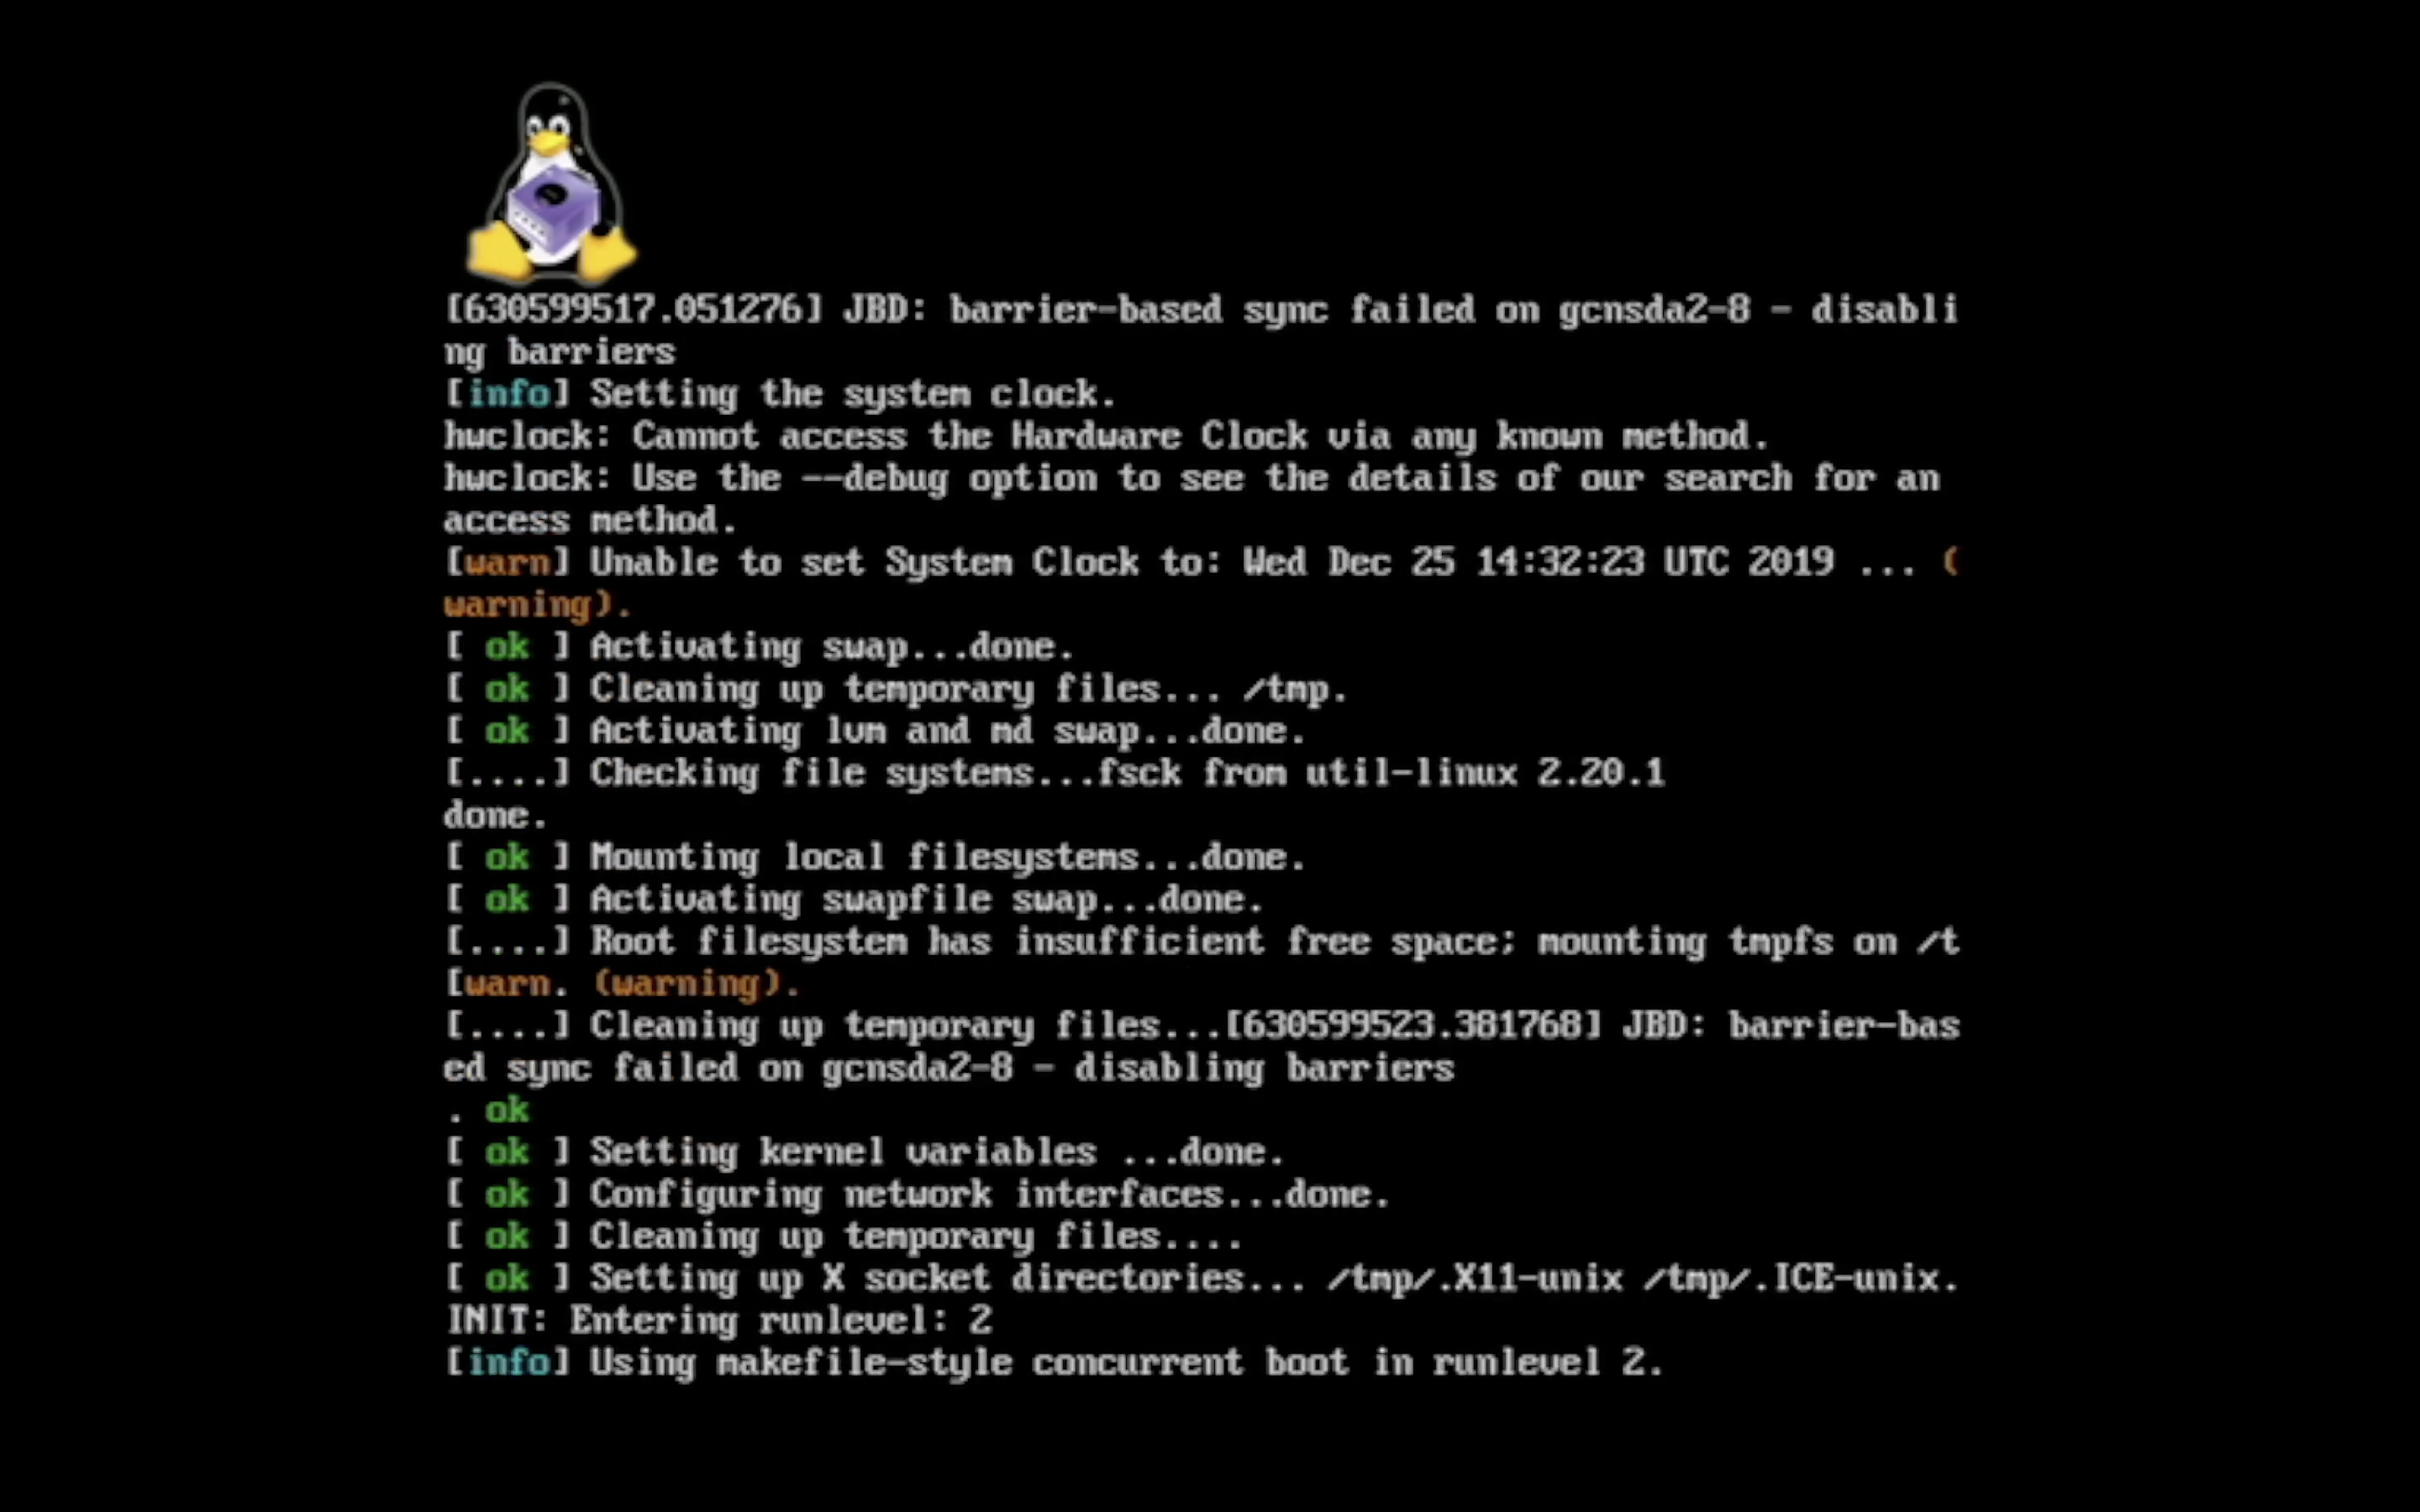
Running Linux on all sort of devices seems to be some peoples favorite hobby, including myself. While there are not that many use cases for Linux on a 20 year old games console, it is still fun to run and seeing what it can do. There is a certain charm in seeing Tux and a wall of text instead of Super Mario for some time. The various information GameCube linux is also a bit fragmented, so it would be good to have some it collected. If you think this sounds fun, then keep on reading to set up your own GameCube Linux box as well!
The main reason for this article is that the information on GameCube linux is a bit fragmented. Having a lot of information, including links presented in one place might be useful. That is exactly what I hope to do here, collect a lot of information in one article so you can easily get going.
There is always that one person who asks "why?!?", so let's give a few reasons:
- Use as a thin client to log into another more powerful machine. Rent a machine with a powerful GPU on something like Linode, Azure etc., and do GPU programming on a GameCube lol!
- Low powered web server.
- Make a GameCube cluster! What's better than Linux on one GameCube? Linux on many!
- Experimenting with the Linux kernel. Test out various kernel flags, boot options etc. to learn more about Linux and what the kernel actually does.
In this article we will focus on booting from an SD card where both the kernel and the file system is on the SD card.
Prerequisites
To run Linux on the GameCube, you need two things:
- Nintendo GameCube console. Physical machine! Emulators like Dolphin is not supported.
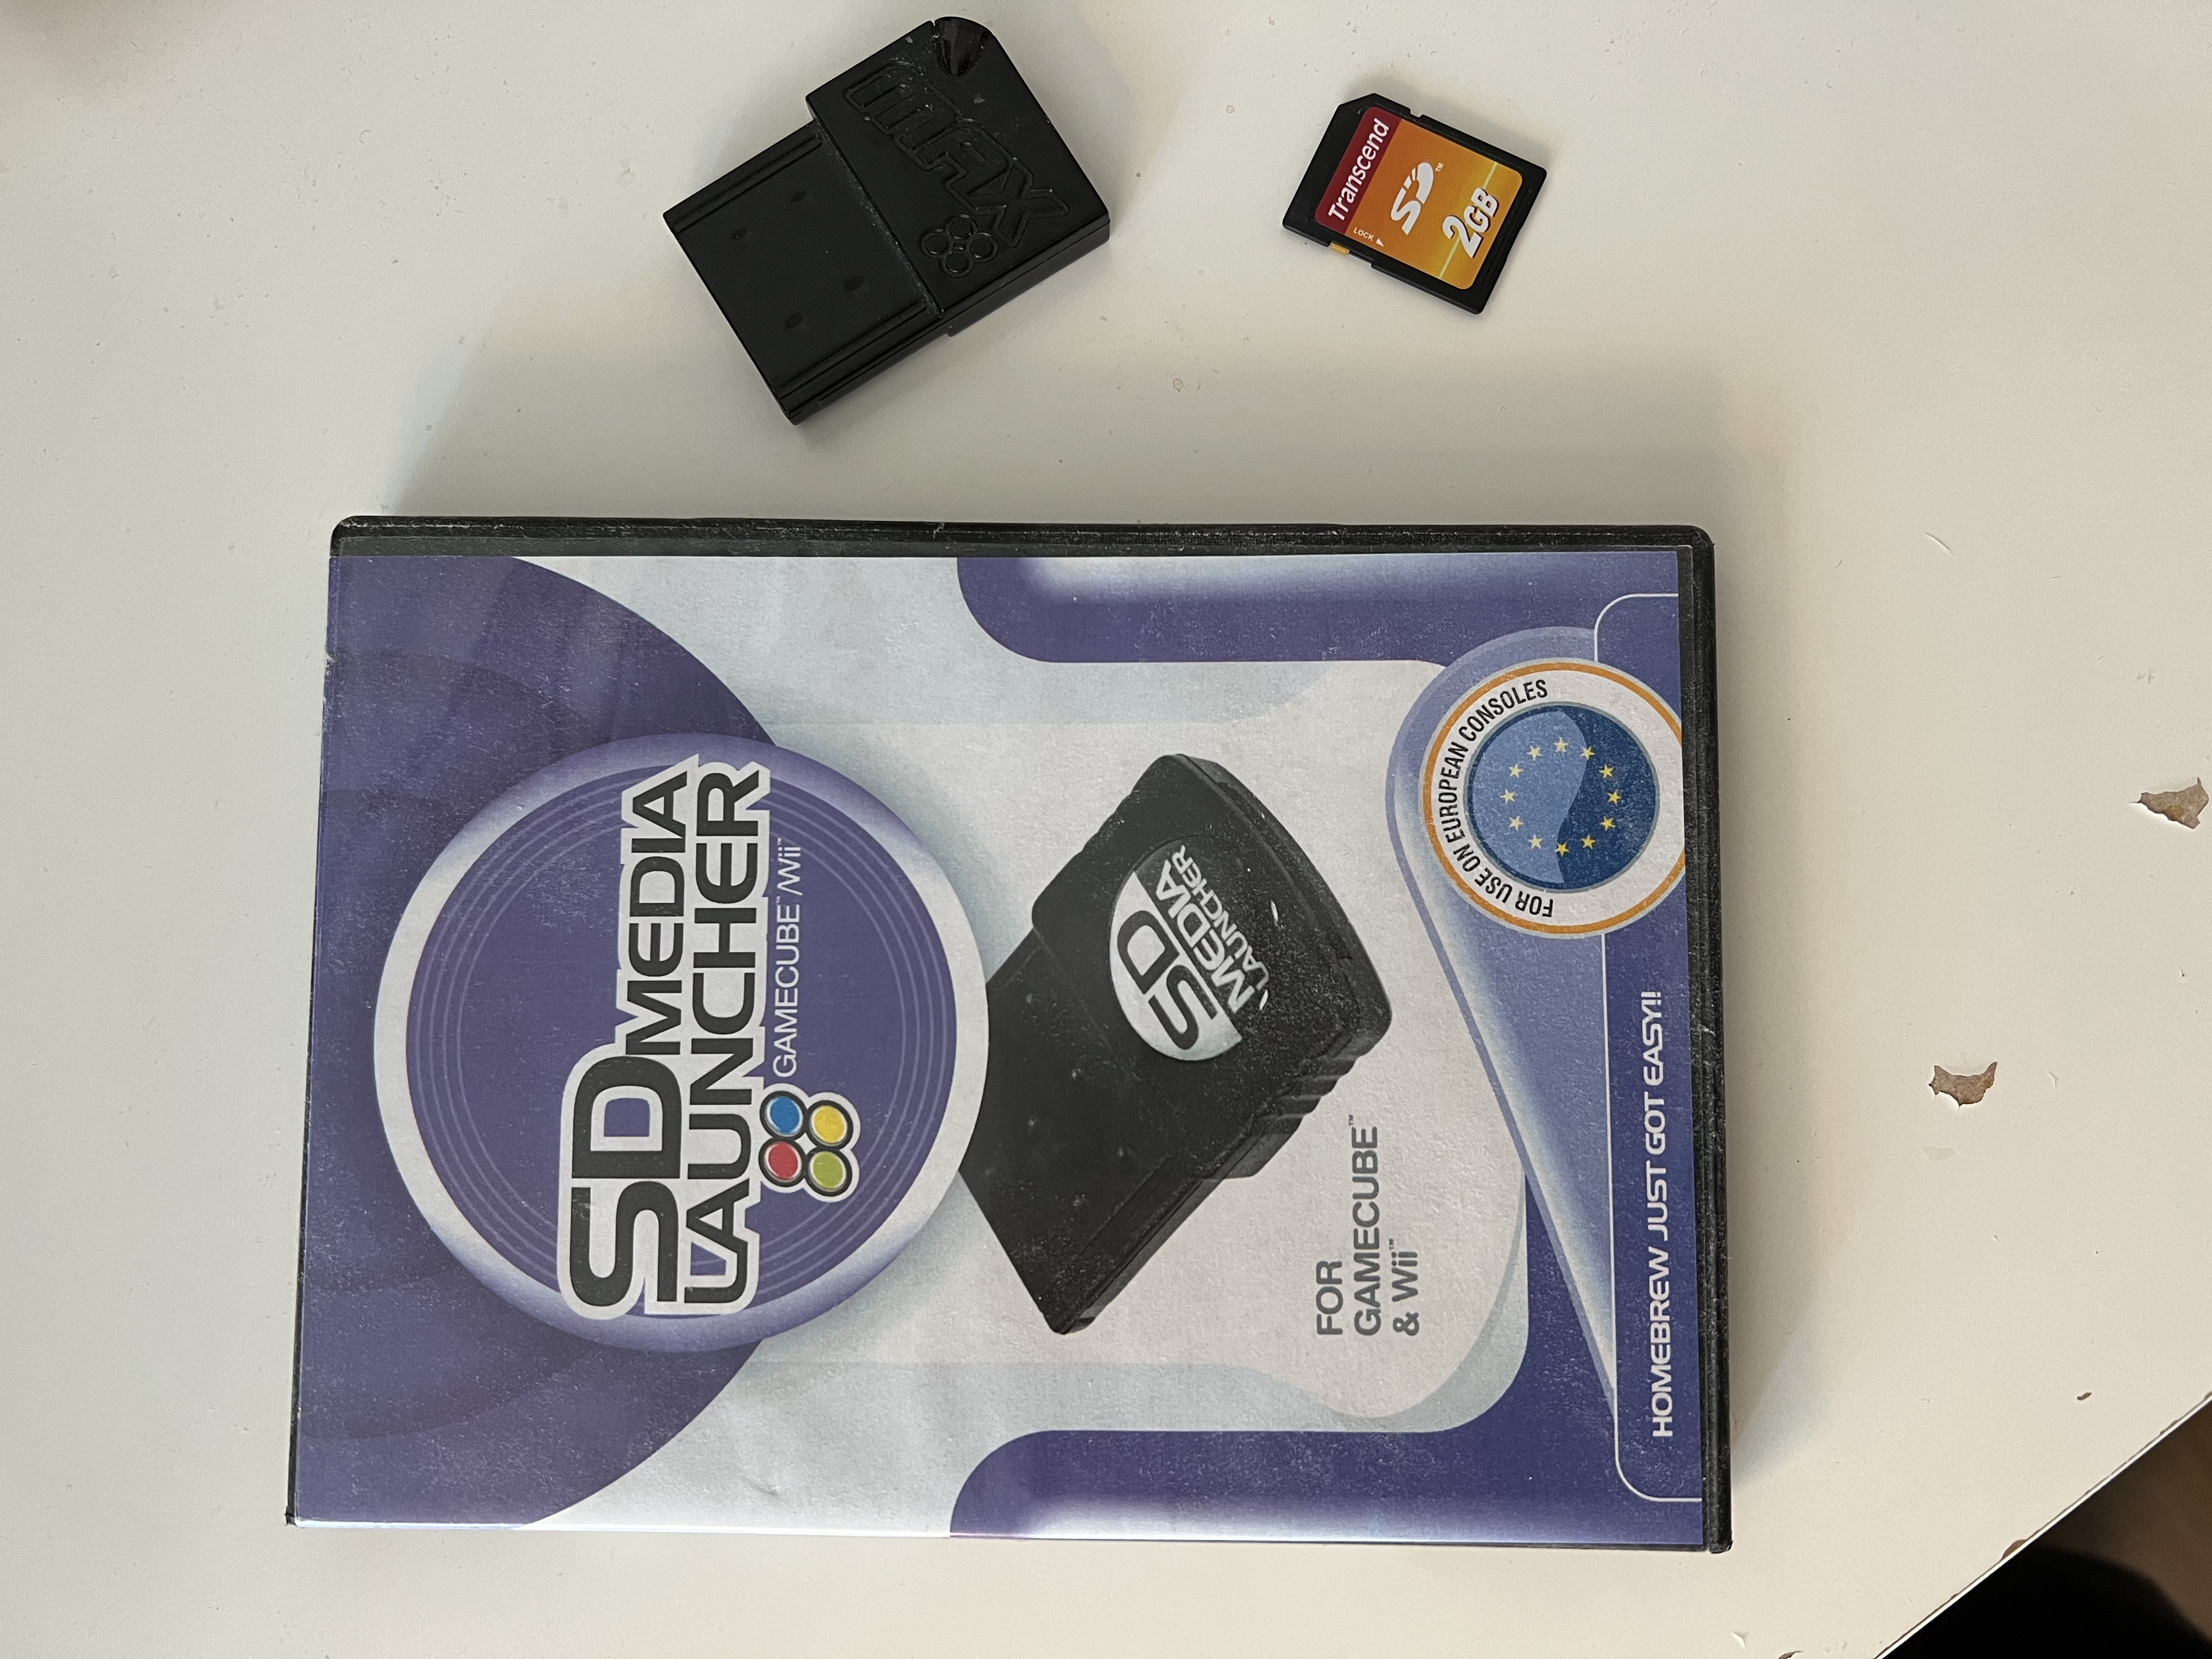
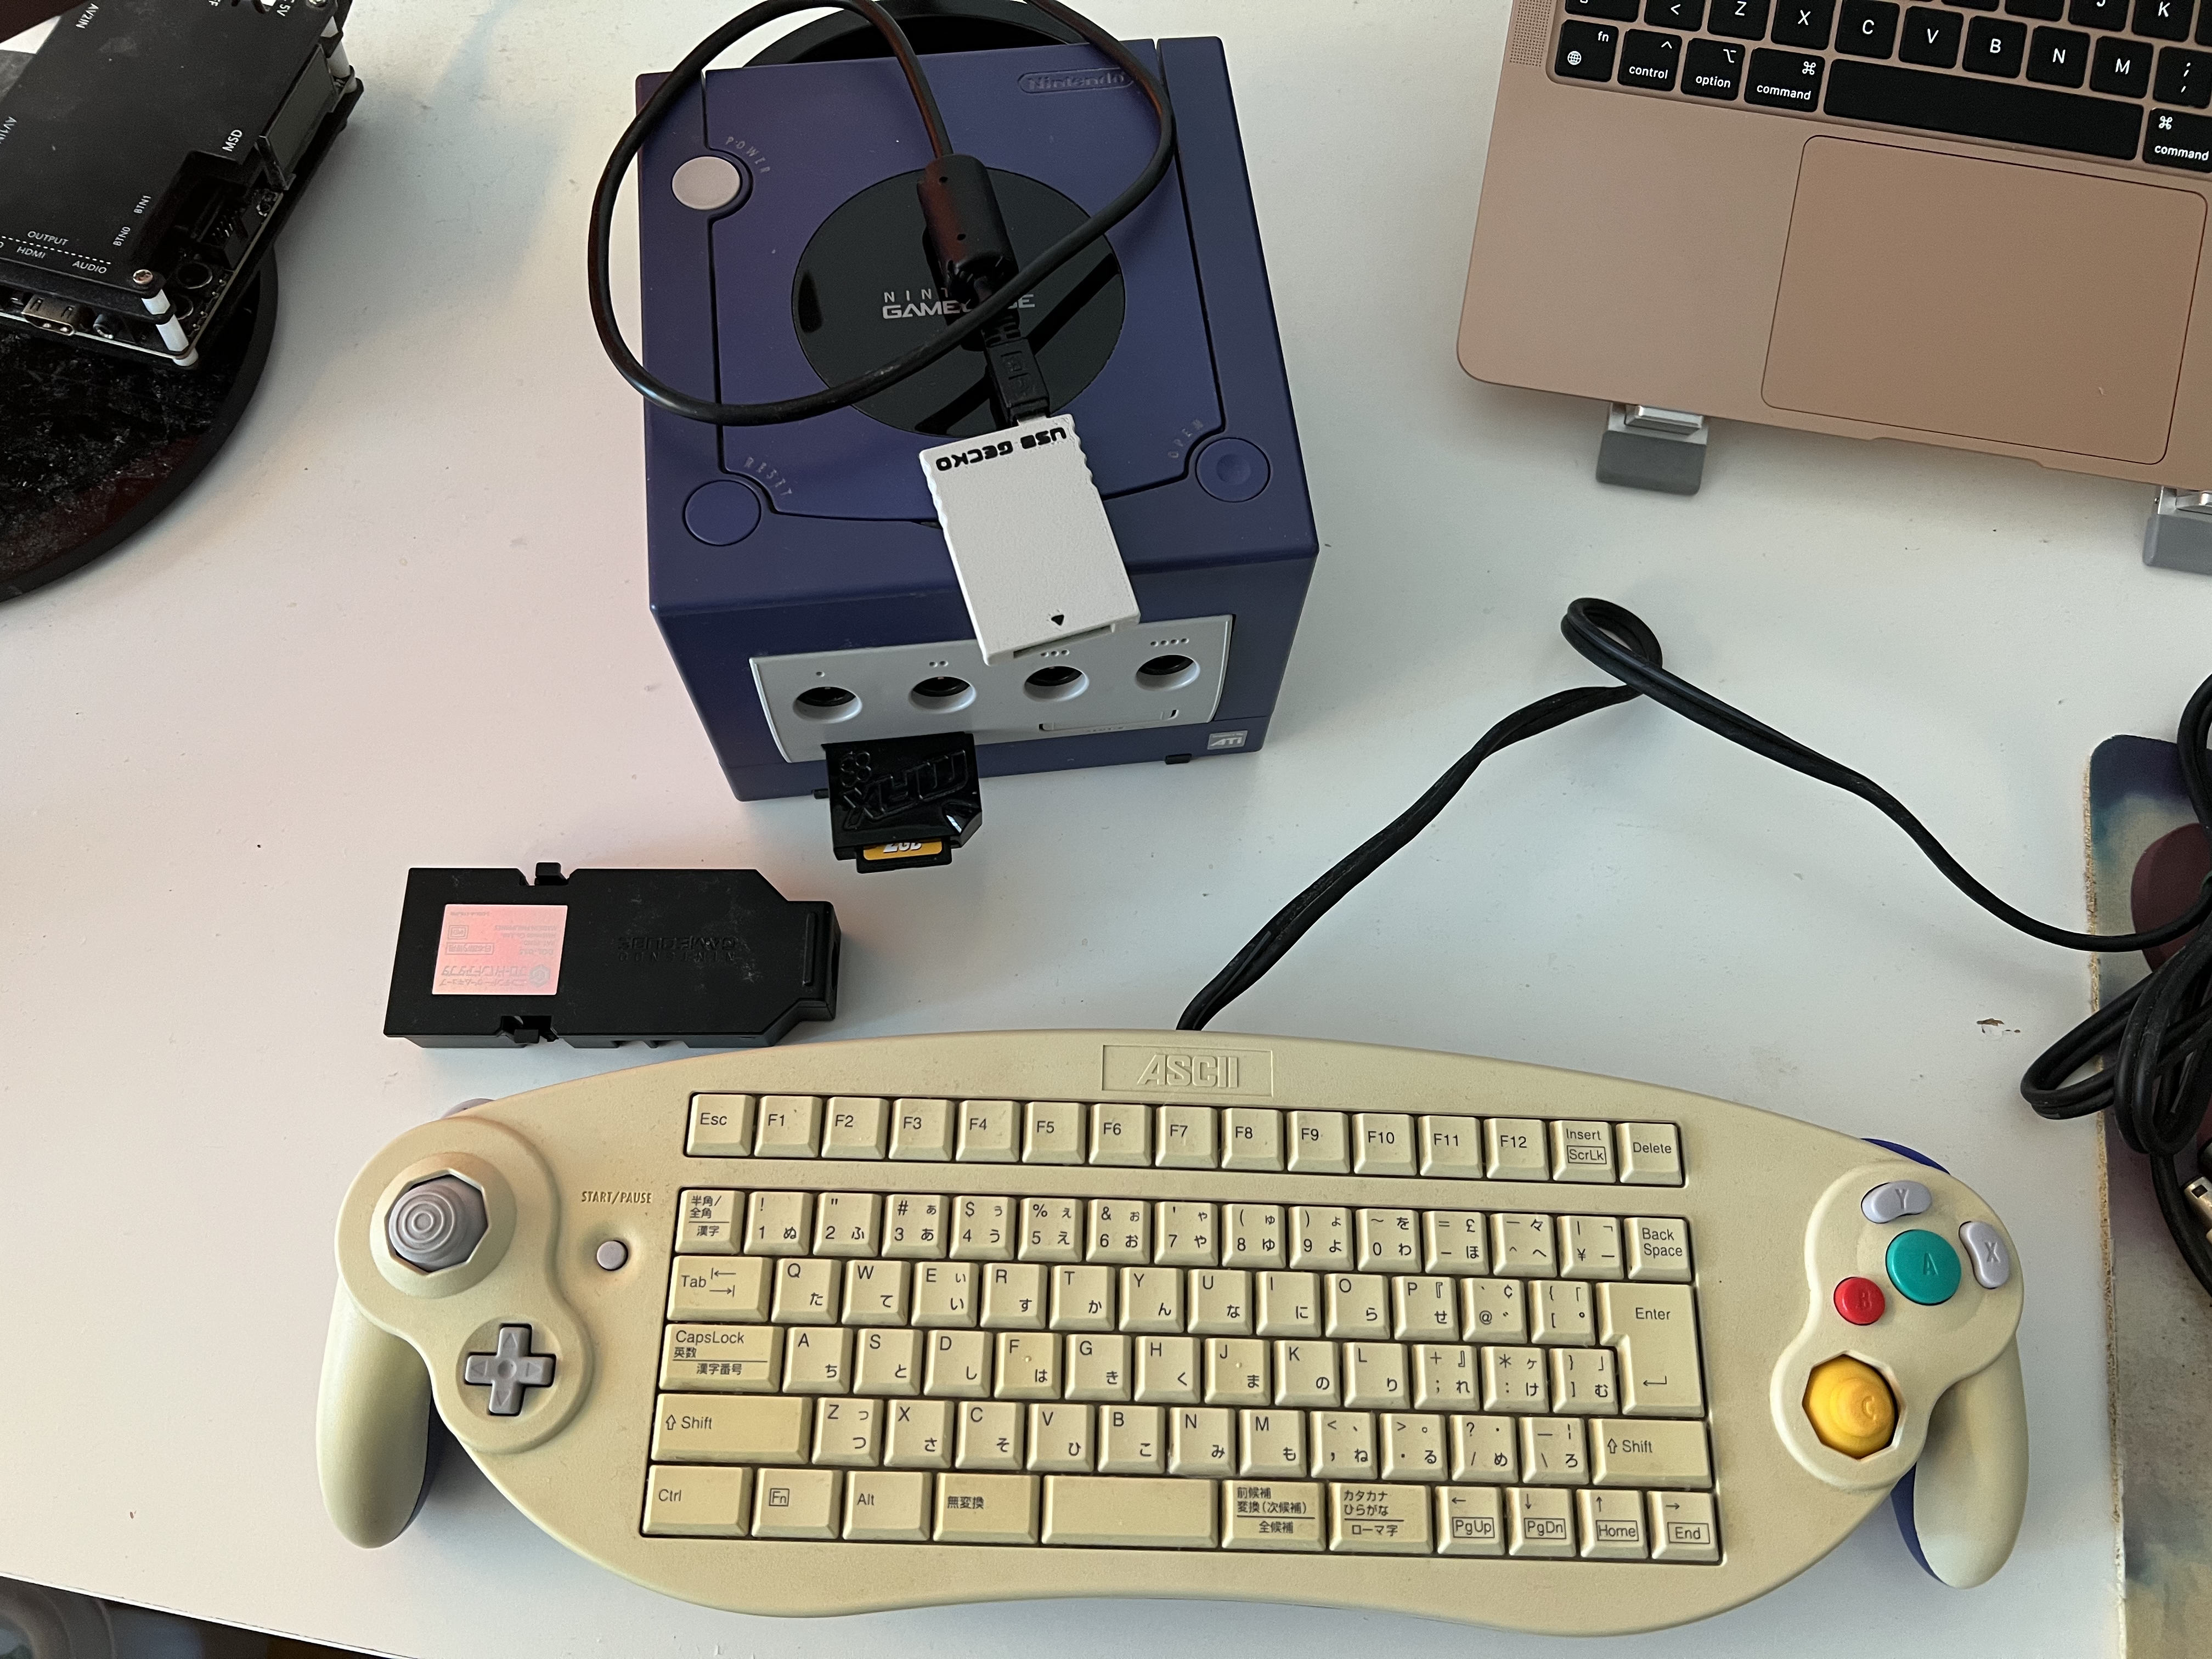
- A way to run homebrew on GameCube. Modchip, Datel SD Media Launcher etc. I use an un-modded GameCube with Datel SD Launcher for all my GameCube homebrew. Other newer modchips like PicoBoot might help with some limitations put there by unmodified systems (e.g, running software by just burning a mini DVD instead of many hoops and loops).
- A way of interacting with the running system, see below.
You will also need a way to interact with the system, as a game controller doesn't do much alone. You could off course create your own application that uses the game controller as input (like done with the experimental MPlayer Frontend distro). For more general purpose usage, you have 3 main options:
- GameCube keyboard controller (quirky layout, but works like a charm!). This is probably the easiest, most interactive way to use the system. Just plug in the controller, and use the the system in an interactive way.
- Broadband adapter. The classic way of booting GameCube linux was by using a Network File System. More importantly; The broadband adapter also gives you another option of using the system: an SSH server. By simply setting up an SSH server on your GameCube, you can log into it using any SSH client on your machine and use it from there.
- USB Gecko is probably the closest to a serial connection we have. It's a small device that plugs into a memory card slot, and a USB cable then connects the USB Gecko to your computer. The main use case for USB Gecko is debugging your applications using GDB, but thanks to having a simple serial protocol, we can configure it for that need as well. We will look at that more closely in the section on booting. Not really easy to get anymore, but there is a seller on Tindie now selling them.
Compiling GameCube Linux
Basic compilation
While the official page provides much information, it can be a bit fragmented and outdated at times. To get the most "up to date" kernels with community patches (e.g, xorg color fixes, SD card support for GameCube etc.), I suggest looking at DeltaRosero' github repo instead. These are the most up to date ones, and provides the most ease of use thanks to including a cross compilation toolchain (you can build your own cross compilation toolchain if you prefer). Many of the newer kernels focus on Wii, but most should also work on GameCube. I mainly use 2.6.32 stable kernel, as it compiles and works without issues on my GameCube. Full branch in DeltaRosero's repo: GC-Wii-Linux-Kernel-2.6.32.y-STABLE
To compile you will need a few basic compilation tools and libraries, like make, gcc, automake, ncurses. On Debian based systems, you can install everything with:
apt-get install -y advancecomp autoconf automake bash build-essential bzip2 ccache coreutils fakeroot file gcc g++ gzip libmpfr-dev libgmp-dev libncurses-dev make binutils
Pro tip: If you get issues on a very new computing setup, remember that the GameCube linux project is a few years old, and compilers and tools change. I use Debian Jessie to compile them, as I got compiler errors in newer versions of make and gcc. The older package repositories probably have versions you need. Docker is your friend. Thanks to debian/eol, you have ancient versions of Debian available anyway :)
Now we have the kernel, and is ready to compile! The creators have included a very useful script called build-gc-wii-kernel.sh, which automates the basic build steps. If you are running a x86 or x64 system, you can use the bundled cross compilation tool chain. (run inside a x86 or x64 container or virtual machine if you are on another platform like M1 Mac!). If you go this route, make sure the MACHINETYPE variable is set correctly.
Compiling as is easy as these 3 steps (the script does these automatically):
- Set the build config file to use to be gamecubedefconfig (in :
make gamecube_defconfig ARCH=powerpc CROSS_COMPILE=H-i686-pc-linux-gnu/cross-powerpc-linux-uclibc/usr/bin/powerpc-linux- - (Optional): review and check for other
make menuconfig ARCH=powerpc CROSS_COMPILE=H-i686-pc-linux-gnu/cross-powerpc-linux-uclibc/usr/bin/powerpc-linux- - Compile the kernel with the given settings
make firmware_install headers_install zImage INSTALL_FW_PATH=lib/firmware INSTALL_HDR_PATH=usr/libs ARCH=powerpc CROSS_COMPILE=H-i686-pc-linux-gnu/cross-powerpc-linux-uclibc/usr/bin/powerpc-linux-
Now we have an elf executable containing our kernel!
Making the resulting elf-executable into the dol format the GameCube can read. Most of the work is done with doltool, which converts the executable into the dol format we can execute on our machine. Do do the necessary work, we use a small script to correct memory addresses and write the dol file using doltool. Stolen from the gc-linux wiki, and given below for preservation purposes:
#!/bin/bash

target=${1:-zImage}
ofile=zImage1

[ -r ${KSRC}/arch/powerpc/boot/${target} ] || {
  echo "Can't find target image ${KSRC}/arch/powerpc/boot/${target}"
  exit 1
}

cp ${KSRC}/arch/powerpc/boot/${target} ${ofile}

CROSS=powerpc-linux-

echo "+ building DOL"
load=$(${CROSS}readelf -l "$ofile" | \
   perl -lane'printf"%08x\n",hex($F[3])+0x80000000 if /LOAD/;')
echo "  LOAD: $load"
entry=$(${CROSS}readelf -l "$ofile" | \
   perl -lane'printf"%08x\n",hex($F[2])+0x80000000 if /Entry point/;')
echo "  EP  : $entry"

${CROSS}objcopy -O binary \
   -R .comment -R .shstrtab -R .symtab -R .strtab \
   -R .gnu.attributes \
   ${ofile} ${ofile}.bin
doltool -c ${ofile}.bin $load $entry
doltool -i ${ofile}.dol
echo ""
(KSRC is the input given)
You now should have a bootable dol file, zImage1.dol! This can be booted in any way you boot homebrew on your GameCube!
Configuration
You will probably want to configure your install. Based upon what you want to use the installation for, there are several options that can affect your experience. If you take a look at modern software like systemd (just an example of a well put wiki-page, not any bigger praises, down with the pithforks now!), you will see that the documentation describes kernel flags and init-arguments.
Build arguments
If you have built a linux kernel before, you know it is based upon config in a .config-file. We have some ready-made config files in our repo, so our first step is often just to use one as a base. When we discussed building earlier, our first operation was simply stating that we want to use the gamecubedefconfig configuration. You find this file in arch/powerpc/configs/gamecubedefconfig.
The contents of this file is simply a set of switches on the form: MYCONFIG=y. (which means MYCONFIG turned on, as omission is by default no).
There are a few small changes I make to this file when building:
# turn serial communication over USB Gecko on
CONFIG_SERIAL_USBGECKO=y

# activate the possibility to use ext3 filesystem
CONFIG_EXT3_FS=y

# Make sure these are commented out. Causes some issues with more modern software like udevd. Might be okay for older software.
# CONFIG_SYSFS_DEPRECATED=y
# CONFIG_SYSFS_DEPRECATED_V2=y
What you may want to set here will depend on what you want to do.
Kernel boot arguments
One of the most important steps to configure during compilation is the kernel boot arguments. You might have to tweak these a bit as a you go, depending on your use case. Where to boot from etc. In arch/powerpc/boot/dts/gamecube.dts you find something along the lines of this (line 23 in my file):
chosen {
    bootargs = "root=/dev/gcnsda2 rw ip=on video=gcn-vifb:tv=auto force_keyboard_port=4";
    linux,stdout-path = &USBGECKO0;
};
Which tells the kernel to read the root file system from the second partition on the first memory card device. The most important bootargs to think abut here is:
- root= - Describes the root file system to boot from. By default, this is a network file system. Above it is changed to the second partition of the memory card in slot A.
- console= - The device to send the kernel log messages to.
- init= - The init application that will run once the system starts. Debian and others use SysVInit, SystemD etc. to start, and a explicit init-target is not needed. If you on the other hand just want to run a script or something, simple, then you can specify it here.
- video= - Describes how the image is rendered to the screen. gcn-vifb is the device to show it to, and tv describes the other settings (PAL vs NTSC and refresh rate). Some useful writeup of the options is available on the GameCube linux wiki.
- forcekeyboardport= - Specifies which port we have our keyboard controller plugged into. I just use port 4 here, is that is where I plug the keyboard into. (for the uninitiated, the GameCube keyboard controller has two plugs; one for the regular gaming controller and one for the keyboard).
- ip=on - Do network setup at boot time.
Creating a root file system - Debootstrap
We now have a kernel we can boot into, but it got nothing to do. As all other Linux-based systems, we need a file system to run in. This file system includes our applications (e.g, bash, emacs etc.) and other things the various distributions include. There are many ways to create Linux root file systems, some of them being:
- debootstrap - Setting up Debian based systems
- arch-bootstrap - debootstrap inspired way to setup Arch Linux.
- More options for Arch
- Seems like dnf in Fedora can do something similar?
The most important part is that you get a Linux root file system. I prefer debootstrap, as I mainly use Debian based systems.
To start, you need to have debootstrap and qemu-user-static available (we are going to run some PowerPC applications as part of the setup, so need to emulate it). If you need a refresher on Qemu User Space, you can look at my previous article on the subject. Remember to activate qemu ppc: update-binfmts –enable qemu-ppc.
We need a place to put this file system into. If you can work directly on a ext2/ext3/ext4 partition, then that is probably the easiest way. I work on a M1 Macbook Air, so I use Docker to make an image for me in Debian (here called mydebian.img):
dd if=/dev/zero of=mydebian.img bs=1 count=0 seek=700M

mkfs.ext4 mydebian.img -O ^metadata_csum
Now we can mount the image and make our debian file system:
mkdir /gamecube
mount mydebian.img gamecube/
Now we can run debootstrap to write the file system to the gamecube directory:
debootstrap --no-check-gpg --foreign --arch=powerpc --variant=minbase --include ca-certificates,emacs wheezy gamecube/ http://archive-klecker.debian.org/debian-archive/debian/
(no check pgp, because Wheezy release is quite old)
Here we set up a PowerPC architecture, minimal install which includes ca-certificates and Emacs.
Now we have to do some final steps by using chroot (change the root of the system and and run a shell from it):
chroot gamecube/
We are now inside our powerpc linux distribution! We can now do some final setup:
# do the final downloading, extracting etc. of system programs
/debootstrap/debootstrap --second-stage

# change root password
passwd

# create a user
apt-get install -y adduser
adduser themkat


# install ssh server
apt-get install -y openssh-server


# add the two first partitions on Memory Card A
mknod dev/gcnsda   b 61 0
mknod dev/gcnsda1  b 61 1
mknod dev/gcnsda2  b 61 2
# now we can mount them and do other things we might want!
These are just some of the things you could do! There are many things you could do based upon your needs. You might also want to set up device nodes during this stage, see later in this article for a small reference.
When you are done, type exit to exit the chroot. Now you can unmount the image file, and it is ready for use!
Setting up a Debian system is a topic in itself, so we have only done the complete basics here. The learn more read the official man page, read this awesome Debootstrap gist (lots that are not relevant in a GameCube linux context, but might still be useful).
Booting and using
Preparing SD card
I use SD Media Launcher, so I run everything from an SD card. My SD card has two partitions:
- 50MB homebrew FAT16 partition. Where I store the dol-files like the kernel we compiled in the previous section).
- 700MB ext4 Debian file system partition. (result from the debootstrap stuff above).
If you have your file system as a image file like I do, then you can burn it to your SD card using dd (disk destroyer!):
dd if=mydebian.img of=/dev/disk4s2
(disk4s2 is the second partition on my SD card. Check your thoroughly before running!!! dd is called disk destroyed for a reason…)
NOTE! Remember that GameCube Linux is an older piece of software and might be missing features in file systems that newer ones take for granted. In many newer formatting tools, ext4 include metadatacsum which gives cryptic errors on GameCube Linux with no support for modern feature 400 or something. Can easily be avoided by remember when making the file system (here we make the file system into an image file): mkfs.ext4 myfilesystem.img -O ^metadatacsum
Interacting with the system
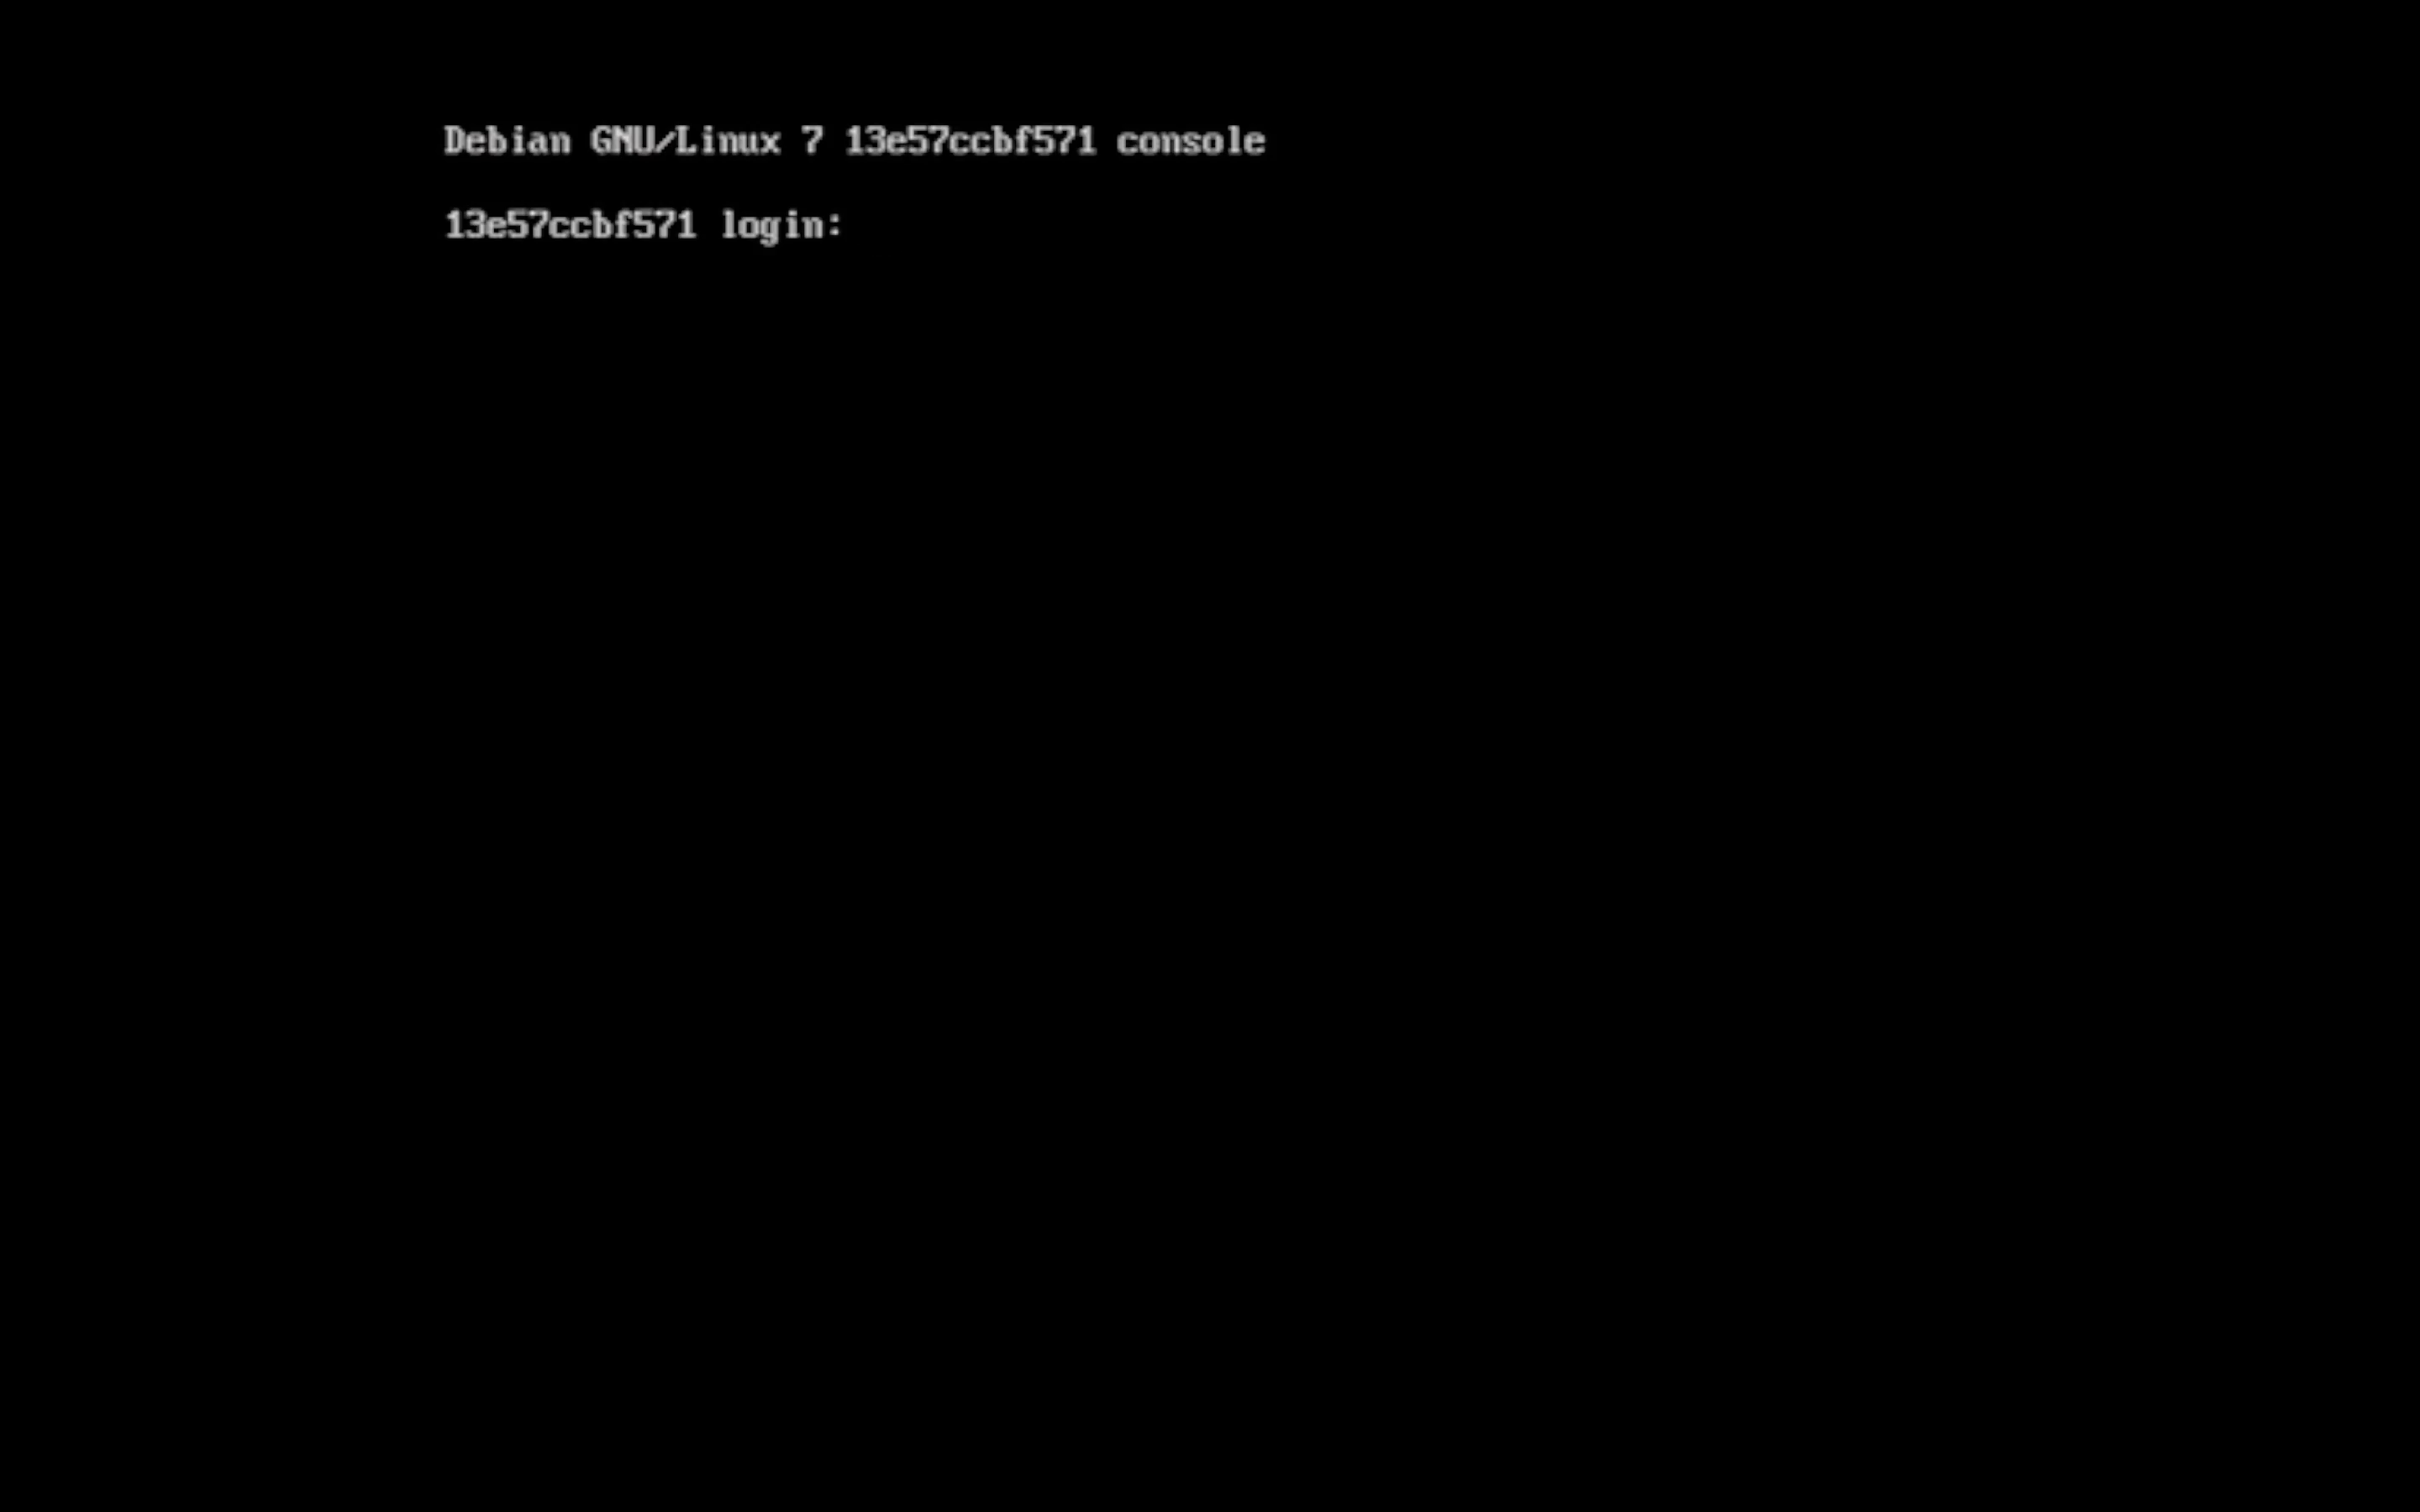
So now we have a Debian based system using SysVInit:
Keyboard controller
Note! I have only tested the ASCII Keyboard Controller ASC-1901PO, but I guess it will work the same for the Action Replay keyboard.
This is probably the easiest way of interacting with the system. Just plug the keyboard in and use! You should make sure you have something to interact with. This can for example be done by setting up a getty (login process) on the console device using /etc/inittab:
0:2345:respawn:/sbin/getty 38400 console
Note: Why console? Why not tty1 or similar? Just because I couldn't find a way of doing so. I usually use my systems by using CTRL-ALT-Fx to navigate ttys, and couldn't find a way to access them interactively. Usually you just spam the inittabs with tty sessions and use them directly.
There are some drawbacks with approach:
- No CTRL-ALT-F1 keys to switch between TTYs. Seems like the layout hardcodes the F-keys to upper case letters. This is the main reason I overuse the console device instead of a tty device.
- Hard coded keyboard layout. The layout seems to be hardcoded to the layout printed on it.
Broadband adapter
The broadband adapter works pretty much out of the box. Just boot your system, and things will connect during initialization thanks to the ip=on boot argument. On boot the GameCube will also print its ip address, which is super convenient if you want to log into it. In Debian you can simply install openssh-server, and you can connect right away.
Having issues connecting to the internet? Only having local connection? Check a few things, like your /etc/resolv.conf and make sure it has valid values. Sometimes it is set to an ip that doesn't resolve correctly. I just set it to the google public dns:
nameserver 8.8.8.8
If you might also want to check your /etc/network/interfaces file to see that it has a valid setting for eth0:
auto eth0
iface eth0 inet dhcp
If you don't have it, you might want to try to install some software that handles internet connections like ifupdown in Debian. Other useful tools for debugging internet includes net-tools (for ifconfig) and iputils-ping (to be able to ping various addresses).
USB Gecko
In the section about compiling above, I activated the USBGECKO serial option. This makes it possible for us to the the USB Gecko device for serial communication. To actually use it, we have to do two things:
Create device node. Port A:
mknod /dev/usbgecko0 c 4 64Port B:
mknod /dev/usbgecko1 c 4 65- Present something, like an application, to our gecko device. One example is by using inittab and specify it to use a getty process:
t1:23:respawn:/sbin/getty 38400 usbgecko1
Using the above process, I can now plug my USB Gecko into slot B and my Macbook Air. On my Mac I see a device called /dev/tty.usbserial-GECKUSB0 when the USB Gecko is plugged in. This means I can for example use screen to log into my gamecube:
screen /dev/tty.usbserial-GECKUSB0
This will behave like any other shell, expect that you are communicating with your host over a GameCube Memory Card port! :)
Usage is also documented on the GC-Linux wiki page with some notes on root logins etc.
Summarizing important device nodes
Like we saw above with USB Gecko, there are a few device nodes that can be useful to make (unless it happens automatically). Some can be useful for mounting file systems, while others are useful for logging in (like: USB Gecko). You can either make these as root on a running system, or during your debootstrap setup.
Memory cards:
# found in comments in drivers/block/gcn-sd.c
# the device itself of memory card A
mknod dev/gcnsda   b 61 0

# the partitions in A
# (max 7 partitions)
mknod dev/gcnsda1  b 61 1
mknod dev/gcnsda2  b 61 2
mknod dev/gcnsda3  b 61 3
mknod dev/gcnsda4  b 61 4
mknod dev/gcnsda5  b 61 5
mknod dev/gcnsda6  b 61 6
mknod dev/gcnsda7  b 61 7


# ---------

# the device itself of memory card A
mknod dev/gcnsdb   b 61 8

# the partitions in A
# (max 7 partitions)
mknod dev/gcnsdb1  b 61 9
mknod dev/gcnsdb2  b 61 10
mknod dev/gcnsdb3  b 61 11
mknod dev/gcnsdb4  b 61 12
mknod dev/gcnsdb5  b 61 13
mknod dev/gcnsdb6  b 61 14
mknod dev/gcnsdb7  b 61 15
Audio RAM:
mknod dev/aram b 37 0
USB Gecko
# port A
mknod /dev/usbgecko1 c 4 64

# port B
mknod /dev/usbgecko1 c 4 65
Other
Sound seems to work out of the box, but requires some setup. The device gcn-ai seems to be detected just fine by Alsa when installed and running. Like all other linux distros set up from scratch, you will probably have some sound issues :)
Troubleshooting
- Many programs getting killed due to memory issues? Remember that GameCube is a game console from 2002 with 24 Mb RAM, so it might not handle all the newest software that well.
- Issues during boot? "attempt to access beyond end of device" (ext2 and ext3) or "block count yyy exceeds size if device xxxx"? Then the GameCube does not seem to recognize the full size of your SD card. The only way I have found so far is to limit the size of my homebrew and ext4 linux partition. Seems like just the way the SD card is seen by the hardware. There was a GC Forever forum thread with the same issue a while back, and I guess a lot of people have ended up here without any clear hint of what the issue may be.
Any issues that might have been fixed in newer kernels? Then maybe a newer kernel can be a good idea to try.
Have you ever run GNU/Linux on your GameCube? Feel free to share your experiences in the comments below!

